Category Archives: Meals

Recipe ReDux: Butternut Squash Cream Cheese Spread

This month’s Recipe ReDux theme is “Dressing for Success.” While the original idea (by my friend and fellow RD Danielle at Food Confidence) was salad dressings, the theme was expanded to include spreads and condiments.

I have posted a bunch of dip and spread recipes in the past so I needed to come up with something new.  A few years ago I made a delicious pumpkin cream cheese dip that I served with cinnamon pita chips – it was really delicious! I couldn’t find my recipe for it, but decided to recreate it for this month’s post. Unfortunately I didn’t have time to roast, scoop, and puree fresh pumpkin and canned pumpkin isn’t so easy to find right now. (A couple of years ago there was a shortage of canned pumpkin and apparently this year should be better, but I had no luck finding any yet. Maybe it’s just too early in the season.) I did however find canned butternut squash, so I used that in place of the pumpkin and the end result was still delicious.

Using canned squash or pumpkin with no added ingredients and low-fat cream cheese keeps this recipe low-calorie, low-fat, and rich in beta-carotene. Portions can be kept small because a little bit of this dip goes a long way.
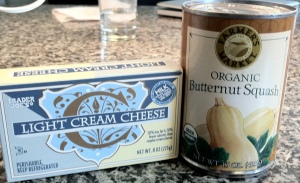
cream cheese spread recipe

Butternut Squash Cream Cheese Spread
Serves 20; Serving Size: ~ 2 tablespoons

Ingredients: 

  • 1 15-ounce can butternut squash
  • 4 ounces low-fat cream cheese (half a bar)
  • Kosher salt, to taste
  • Ground cinnamon, to taste

Directions:

  1. In a food processor, combine the butternut squash and cream cheese. Blend until well combined. Add salt and cinnamon to taste and blend well.
  2. Chill and serve with pita chips, crackers, or vegetables.
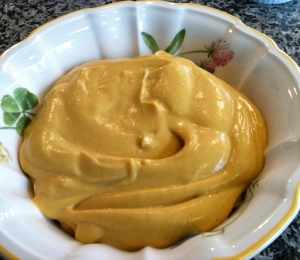
butternut squash cream cheese spread recipe

Nutrition Facts (per 2 tbsp): 23 calories, 1 g total fat, 1 g saturated fat, 2 g carbohydrate, 1 g fiber, 1 g sugar, 1 g protein, 4 mg cholesterol, 40 mg sodium

Check out these other great “Dressing for Success” recipes from my fellow ReDuxers!

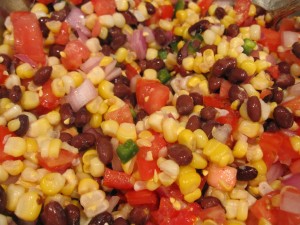
Corn and Black Bean Salsa

Labor Day may have passed (I know, it feels like it was a long time ago!), but it’s still warm and summery here in New York. Luckily that also means that summer produce is still around. A few weeks ago I realized I hadn’t really had much corn all summer, so I went on a little corn kick and made grilled corn on the cob, corn and tomato salad, and this delicious corn and black bean salsa, which I served with fish tacos. I had a lot of leftovers, so I ended up eating the salsa as a side dish for the rest of the week!

Corn & Black Bean Salsacorn black bean salsa
Serves a lot

Ingredients:

  • 4 ears corn
  • 1 15-ounce can no salt added black beans, drained
  • 1/2 red onion, chopped
  • 1/2 jalapeno pepper, seeds removed
  • 1 1/2-2 beefsteak tomatoes, diced
  • 3 tablespoons fresh lime juice
  • Salt to taste
  • Cilantro, if desired

Directions:

  1. Bring a large pot of water to a boil and cook the corn for about 3 minutes. Remove the corn and set aside until cool enough to handle. Using a paring knife, cut the corn off the cob into a large bowl.
  2. Add the remaining ingredients and toss to mix.

Did you have your fill of corn this summer? What are your favorite ways to enjoy it?

Seasonal Pizza

My husband and I are pizza lovers. (Is there anyone who isn’t?!) In the past we would order in or go out for pizza, or occasionally we would enjoy a Kashi frozen pizza. But last December when I was testing recipes for We Can Cook, I made pizza at home and we really loved it. (The only other time I have ever made pizza at home is on Passover when I make matzo pizza.) Although I didn’t make the dough from scratch, it was still really fun to make the pizza – rolling out the dough, choosing the toppings, and seeing it turn into a delicious meal. Not to mention that it was so much cheaper than getting it ready made!

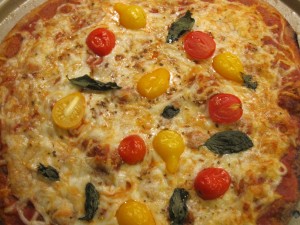
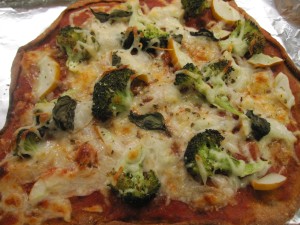
Last week when I made the cucumber soup I decided to make pizza to round out the meal. I had beautiful farm-fresh cherry tomatoes, basil, summer squash, and some leftover roasted broccoli on hand as toppings. I bought the whole wheat pizza dough from Trader Joe’s, divided it in two to make two pizzas, topped each crust with tomato sauce, part-skim shredded mozzarella cheese, and veggies, and watched it cook. Ten minutes later we had two Nutritioulicious pizzas (plus enough for lunch leftovers).

pizza recipe

Margarita Pizza with Cherry Tomatoes and Basil

healthy pizza

Summer Squash and Broccoli Pizza

If you’re going out for pizza, be sure to check out my tips for how to make it a healthy slice!

Have you ever made pizza at home? What are your favorite pizza toppings? 

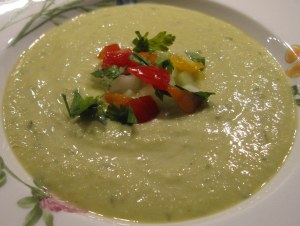
Chilled Cucumber Soup

It’s that time of year again – lots of cucumbers available fresh from the farm. A couple of summers ago I shared a recipe for a new twist on traditional cucumber salad. With the plethora of CSA cucumbers that have piled up I decided to try another new recipe showcasing this nutritioulicious vegetable.

My cucumber soup recipe was inspired by the one from Eating Well, with just a few modifications. It was really easy to make, and quick too!

Chilled Cucumber Soup
Serves 4; Serving Size: ~1 cupcucumber soup recipe

Ingredients:

  • 1 tablespoon olive oil
  • 2 cloves garlic, minced
  • 1 shallot, diced
  • 1 small onion, diced
  • 2 tablespoons fresh lemon juice, divided
  • 4 cups peeled, seeded, and thinly sliced cucumbers, plus 1/4 cup chopped cucumber for garnish
  • 1 1/2 cups low-sodium vegetable broth
  • 1/2 teaspoon Kosher salt
  • Freshly ground pepper
  • Pinch of chili powder
  • 1 avocado, diced
  • 1/4 cup chopped fresh parsley, plus more for garnish
  • 1/2 cup nonfat plain Greek yogurt
  • Diced tomatoes for garnish

Directions:

  1. Heat oil in a large saucepan over medium-high heat. Add garlic, shallots, and onion and cook, stirring occasionally, until tender, 1 to 4 minutes. Add 1 tablespoon of lemon juice and cook for 1 minute. Add the 4 cups of cucumber slices, broth, salt, pepper, and chili powder and bring to a simmer. Reduce heat and cook at a gentle simmer until the cucumbers are soft, 6 to 8 minutes.
  2. Transfer the soup to a blender. Add avocado and parsley and blend on low speed until smooth. Add the second tablespoon of lemon juice to taste and blend. (Use caution when pureeing hot liquids.) Pour soup into a serving bowl and stir in the yogurt. Refrigerate until chilled.
  3. Serve the soup garnished with diced cucumber and tomato and the chopped parsley. Enjoy!

cucumber recipes
Nutrition Note: Cucumbers are in the same family of fruit and vegetables as squash, watermelon, and cantaloupe. Nutritionally, cucumbers are a good source of phytonutrients that have anti-inflammatory and antioxidant benefits. They are also a good source of the antioxidants vitamin C and beta-carotene. Because they are water-rich, cucumbers are excellent low-calorie vegetables.

What are your favorite ways to enjoy cucumbers? 

Recipe ReDux: Watermelon Sorbet

When I first found out this month’s Recipe ReDux theme, frozen desserts, I was a little worried. First of all, I don’t make dessert very often – don’t get me wrong, I eat plenty of it, I just buy it instead! Second, I don’t have an ice cream maker or popsicle molds, so all the ideas that originally came to mind wouldn’t work. But as I continued to think about what I would make, I realized simplicity was the way to go. Plus, I wanted to make something that most people could easily whip up without having special gadgets taking up room in their kitchens.

Watermelon sorbet sounds like it would be a lot more complex to make than it actually was. This recipe is so quick and easy, only requires a blender and ramekins, and the result is a refreshing treat that the whole family can enjoy. An added bonus: it’s low in calories and a great source of the antioxidants vitamin A and lycopene too! (Find out more of the nutritional benefits of watermelon.)

watermelon sorbet

Ready to serve!

Watermelon Sorbet
Serves 4

Ingredients:

  • 1 tablespoon sugar
  • 1/4 cup water
  • 2 cups watermelon cubes
  • 3 teaspoons fresh lemon juice

Directions:

  1. Combine the sugar and water in a small saucepan and bring to a boil. Reduce the heat and simmer until the sugar is completely dissolved. (Since there is very little sugar, this will happen quickly. Keep an eye on it to make sure the water doesn’t evaporate.) Remove from the heat and set aside.
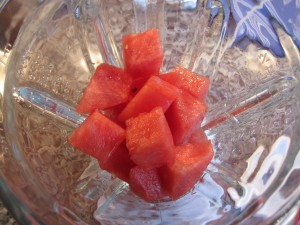
  2. In a blender, combine the watermelon cubes, lemon juice, and simple syrup. Blend until no watermelon chunks remain.

making watermelon sorbet

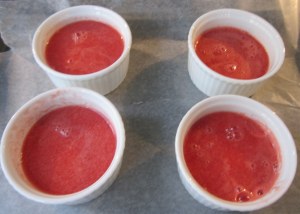
  1. Divide the mixture evenly among four ramekins. Cover with plastic wrap and freeze for at least three hours. Enjoy!
watermelon sorbet

Watermelon sorbet before freezing

Nutrition Facts (per serving): 35 calories, 9 g carbohydrate, 8 g sugar (only 3 g added sugar), .5 g protein, 0 g fat

For more delicious frozen desserts, check out these great recipes from my fellow ReDuxers!

Cooking With Summer Squash and Tomatoes

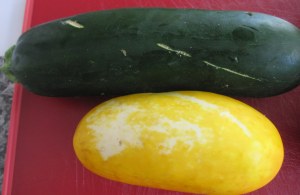
This past weekend I had a handful of heirloom tomatoes and some summer squash from my CSA share, so I did a quick search online for something different to make using the produce.

cooking with summer squash  cooking with heirloom tomatoes

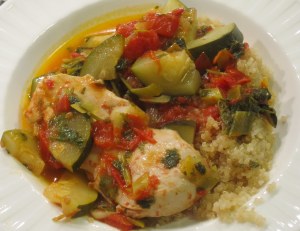
I found a great recipe for Moroccan Chicken on Martha Stewart’s Everyday Food website. The recipe was for one, but I more than doubled it so that Andy and I would both be able to enjoy it (and have leftovers too!) and I made it with quinoa instead of couscous for the additional nutrition benefits.

moroccan chicken recipeWe liked the recipe, but I think it needed some more spices to make it more traditional Moroccan cuisine. It was certainly quick and easy to make and a great use for our fresh veggies.

How do you like to cook with summer squash and tomatoes?

Tomatoes and Basil

As you may know from summer’s past, I love farm-fresh tomatoes. What I love even more is the simple yet nutritious and delicious combination of tomatoes and basil. Lucky for me I have both from my CSA this week, which makes me so happy! This afternoon as I was looking in my fridge and pantry for an afternoon snack, I thought “Why not make a little tomato and basil salad?” In less than three minutes I had this beautiful salad, which paired with some cheese made for a filling and balanced snack!

tomatoes and basil

How good does that look?!

Ingredients:
  • Handful cherry tomatoes
  • 2-3 basil leaves
  • Extra-virgin olive oil
  • Aged balsamic vinegar
  • Salt & freshly ground pepper
Directions:
  1. Rinse tomatoes and basil in cold water and pat dry. Slice tomatoes in half and add to a small bowl. Tear basil leaves and add to tomatoes. Drizzle olive oil and vinegar on top of tomatoes and basil. Season to taste with salt and pepper. Enjoy the fresh flavors of the summer!

Looking for another tomato recipe? Try the Tomato Jam I made last fall.

Do you like tomatoes? What’s your favorite way to enjoy them?

Recipe Redux: Grilled Salmon Burgers with Cherry Chutney

I am excited to be part of a new recipe challenge that is starting this month, called The Recipe Redux.  Perhaps you have seen other recipe challenges in the blogosphere, but this one is different because it’s founded by registered dietitians like myself! Every month I will post a recipe based on a theme set by the founders of The Recipe Redux and I will share with you links to other Recipe Reduxer blog posts – that means you’ll end up with lots of new recipes to try! This month’s theme is grilling, a topic I have covered before. So I racked my brain for something new I could grill and here is what I came up with: Grilled Salmon Burgers with Cherry Chutney (and a side of snap peas).

healthy grilling recipes

Grilled Salmon Burgers
Serves 4 

Ingredients:

  • 1 pound salmon fillet, skinned and chopped
  • 3/4 cup finely chopped red onion
  • 1 serrano pepper, diced (remove seeds before dicing and add based on level of spiciness desired)
  • 1 tablespoon fresh lemon juice
  • 1 large egg white
  • 1-2 tablespoons whole wheat panko
  • 1/4 teaspoon Kosher salt
  • Freshly ground pepper, to taste
  • Cooking spray for the grill
  • 4 whole wheat hamburger buns
  • Cherry Chutney (see recipe below)

Directions:

  1. In a large bowl, combine the first 8 ingredients and mix well.
  2. Divide the mixture into 4 equal portions, shaping them into burger patties.
  3. Heat a grill pan or outdoor grill to medium-high heat and coat pan or grill grates with cooking spray. When the grill is hot, add the patties and cook about 3 minutes on each side or until cooked to desired degree of doneness. Serve patties on hamburger buns with Cherry Chutney on top.
salmon burger recipe   cherry chutney recipe

Cherry Chutney
Serves ~ 8

Ingredients:

  • 1 cup pitted cherries, sliced in half
  • 1/2 cup cider vinegar
  • 1/2 cup chopped red onion
  • 1 habanero pepper, minced (remove seeds before dicing and add based on level of spiciness desired)
  • 3 tablespoons sugar
  • 1/2 tablespoon fresh lemon juice
  • pinch of ground ginger
  • pinch of ground cinnamon
  • pinch of ground nutmeg
  • 1 teaspoon cornstarch

Directions: 

  1. In a small saucepan, combine all the ingredients except for the cornstarch. Bring to a boil over medium heat.
  2. Turn down the heat, cover, and simmer gently for about 30 minutes.
  3. Remove cover and continue to simmer for about 5 minutes. If the mixture is still very liquidy, add cornstarch and stir until it dissolves well. Simmer for another few minutes until the mixture has thickened.
  4. Remove from the heat and transfer to a bowl. If you have time, refrigerate the chutney for about an hour (and up to a week). Chutney will thicken as it cools.

For more grilling inspiration, here are the other great recipes from Recipe Reduxers:

Alexandra Caspero Alexandra made Grilled Summer Fruit Salad
Alysa Bajenaru – Inspired RD Alyssa from InspiredRD made Grilled Romaine Salad
Ann Dunaway Teh – Eat to Nourish, Energize & Flourish!  Grilled Flank Steak with Grilled Corn and Peach Salsa
Cindy Brison – Nutrition Know How
Chef Pandita
Danielle Omar – Food Confidence Grilled Sweet Peppers
Diane Welland – EatWellEatClean Grilled Beet & Onion Salad with Goat Cheese
Dr Barb’s Grilled Corn and Tomato Salad – The Nutrition Budgeteer
EA Stewart – The Spicy RD Grilled Polenta Veggie Stacks with Balsamic Cherry Tomatoes
Emma Stirling – The Scoop on Nutrition Char Siu BBQ Pork
Gretchen – Kumquat Grilled Tandoori Chicken Skewers
Jackie Mills- Delicious Diabetes Cooking Grilled Proscuitto Shrimp with Asian Dipping Sauce
Jessica Fishman Levinson – Nutritioulicious Grilled Salmon Burgers with Cherry Chutney
Kat Lynch – Eating The Week Portobello mushrooms stuffed with spiced couscous
Katie Caputo- East Meats West Succulent Sirloin Kabobs
Kristen – Swanky Dietitian Portabella Mushroom Burgers with Grilled Corn
Lisa – Healthful Sense Grilled Veggie Bean Burgers
Liz Weiss and Janice Newell Bissex – Meal Makeover Moms’ Kitchen Mushroom Burgers with the Works, Mushroom Cannellini Spread
Marie Spano Italian Grilled Turkey Burgers
Nicole Ferring Holovach – Whole Health RD Grilled Eggs
Rebecca Scritchfield – MeFirst Grilled Plantains: A Sweet Summer Side Dish
Regan – The Professional Palate Grilled Eggplant & Two-Tomato Whole-Wheat Piadina
Serena – Teaspoon of Spice Grilled Watermelon Salad

Quick Quinoa Lunch

The other day I found myself scrounging for ingredients to make lunch at home (clearly I hadn’t planned my food shopping very well!). I didn’t have any lettuce to make a regular salad and I didn’t have any sandwich toppings, but I did have some vegetables, canned beans, and a whole bunch of grains in the pantry.

As you probably know by now, I love quinoa (and if you didn’t know, just check out some of my previous quinoa posts). I especially love how quickly it can be cooked up, which is perfect for a last-minute lunch dish. I ended up with a balanced, satisfying, and delicious lunch that took less than 20 minutes to make (ok – maybe this is longer than it takes to make most lunches, but it was so easy and the active time was only five minutes!).

Vegetable and Chickpea Quinoa Salad
Serves 2

Ingredients:

  • 1/2 cup dry quinoa, rinsed and drained
  • 1 cup water or low-sodium broth
  • 1/2 yellow or orange bell pepper, diced
  • 2-3 scallions, chopped
  • 4-5 roasted asparagus, chopped
  • 4 sun-dried tomatoes in oil, chopped
  • 1/2 can no-sodium chickpeas, drained and rinsed
  • Handful cilantro, chopped
  • 1 tablespoon olive oil
  • Salt and pepper, to taste

quinoa salad recipe
Directions:

  1. Cook quinoa according to package directions in water or broth. When fully cooked (water is completely absorbed), rinse under cold water and drain. Set aside in a bowl to cool.
  2. When quinoa is at room temperature, add the rest of the ingredients and toss to combine. Divide between two bowls and serve.

Nutrition Facts (per serving): 400 calories, 14 g protein, 55 g carbohydrate, 10 g fiber, 14 g fat (2 g saturated fat), 284 mg sodium

What do you make for lunch when you’re home?

Quinoa-Stuffed Cornish Hens

Most Friday nights my husband and I stay in for dinner and I cook something that takes a little more time to prep than during the week. I try to keep it interesting and vary the main dish, so some weeks I make traditional roast chicken and other times I make more unique recipes like beef stew and miso-ginger chicken and cabbage.  A couple of weeks ago we had company over and I tried a new recipe that I really loved. It was different than the typical roast chicken my husband is getting sick of and looked fancier than a basic chicken dish, but was still fairly easy to make. Of course I tweaked the original recipe that I found at Food & Wine, but the end result was great!

Quinoa-Stuffed Cornish Hens (adapted from Food & Wine’s Couscous-Stuffed Cornish Hens)
Serves: 6   

Ingredients:

cornish hens recipe

  • 1/2 cup slivered almonds
  • 2 cups low-sodium vegetable stock
  • 1/2 cup dried apricots, chopped
  • Kosher salt
  • 1 cup quinoa, rinsed and drained
  • 2 tablespoons honey
  • 1/2 teaspoon ground cinnamon
  • Fresh-ground black pepper
  • 3 Cornish hens
  • 2 tablespoons cooking oil
  • 1/3 cup water
Directions:
  1. Heat oven to 350 degrees F. Toast the nuts in the oven until golden brown, 5 to 10 minutes. Remove and set aside. Raise the heat to 425 degrees F. 
  2. In a small saucepan, bring the broth, apricots, 1/4 teaspoon salt, and the quinoa to a boil. Reduce heat, cover, and simmer for about 15 minutes or until all the broth is absorbed. Remove from the heat and add the almonds, 1 tablespoon of honey, the cinnamon, and 1/8 teaspoon of salt and pepper. 
  3. Fill the cavities of the hens with the quinoa mixture. Twist the wings of the hens behind their backs, and if you like, tie the legs together. Put the hens breast-side up in a roasting pan. Coat the hens with the oil and sprinkle with 1/8 teaspoon salt and pepper. 
  4. Roast the hens for 25 minutes. Drizzle with the remaining tablespoon of honey and continue roasting until just done, about 10 to 15 minutes longer. 
  5. When the hens are done, transfer them to a plate and leave to rest in a warm spot for about 5 minutes. Spoon the fat from the roasting pan and add the water to the juices. Cook over moderate heat, scraping the bottom of the pan to dislodge any brown bits, until reduced to 1/3 cup, about 3 minutes. Add a pinch each of salt and pepper. Cut the hens in half and serve with the stuffing and pan juices.