Category Archives: Lunch

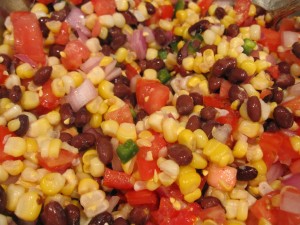
Corn and Black Bean Salsa

Labor Day may have passed (I know, it feels like it was a long time ago!), but it’s still warm and summery here in New York. Luckily that also means that summer produce is still around. A few weeks ago I realized I hadn’t really had much corn all summer, so I went on a little corn kick and made grilled corn on the cob, corn and tomato salad, and this delicious corn and black bean salsa, which I served with fish tacos. I had a lot of leftovers, so I ended up eating the salsa as a side dish for the rest of the week!

Corn & Black Bean Salsacorn black bean salsa
Serves a lot

Ingredients:

  • 4 ears corn
  • 1 15-ounce can no salt added black beans, drained
  • 1/2 red onion, chopped
  • 1/2 jalapeno pepper, seeds removed
  • 1 1/2-2 beefsteak tomatoes, diced
  • 3 tablespoons fresh lime juice
  • Salt to taste
  • Cilantro, if desired

Directions:

  1. Bring a large pot of water to a boil and cook the corn for about 3 minutes. Remove the corn and set aside until cool enough to handle. Using a paring knife, cut the corn off the cob into a large bowl.
  2. Add the remaining ingredients and toss to mix.

Did you have your fill of corn this summer? What are your favorite ways to enjoy it?

Seasonal Pizza

My husband and I are pizza lovers. (Is there anyone who isn’t?!) In the past we would order in or go out for pizza, or occasionally we would enjoy a Kashi frozen pizza. But last December when I was testing recipes for We Can Cook, I made pizza at home and we really loved it. (The only other time I have ever made pizza at home is on Passover when I make matzo pizza.) Although I didn’t make the dough from scratch, it was still really fun to make the pizza – rolling out the dough, choosing the toppings, and seeing it turn into a delicious meal. Not to mention that it was so much cheaper than getting it ready made!

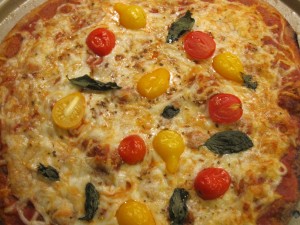
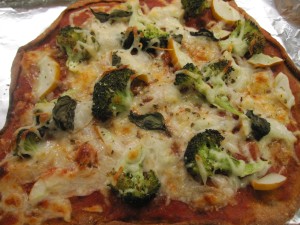
Last week when I made the cucumber soup I decided to make pizza to round out the meal. I had beautiful farm-fresh cherry tomatoes, basil, summer squash, and some leftover roasted broccoli on hand as toppings. I bought the whole wheat pizza dough from Trader Joe’s, divided it in two to make two pizzas, topped each crust with tomato sauce, part-skim shredded mozzarella cheese, and veggies, and watched it cook. Ten minutes later we had two Nutritioulicious pizzas (plus enough for lunch leftovers).

pizza recipe

Margarita Pizza with Cherry Tomatoes and Basil

healthy pizza

Summer Squash and Broccoli Pizza

If you’re going out for pizza, be sure to check out my tips for how to make it a healthy slice!

Have you ever made pizza at home? What are your favorite pizza toppings? 

Chilled Cucumber Soup

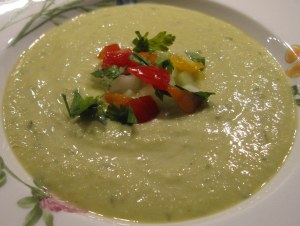
It’s that time of year again – lots of cucumbers available fresh from the farm. A couple of summers ago I shared a recipe for a new twist on traditional cucumber salad. With the plethora of CSA cucumbers that have piled up I decided to try another new recipe showcasing this nutritioulicious vegetable.

My cucumber soup recipe was inspired by the one from Eating Well, with just a few modifications. It was really easy to make, and quick too!

Chilled Cucumber Soup
Serves 4; Serving Size: ~1 cupcucumber soup recipe

Ingredients:

  • 1 tablespoon olive oil
  • 2 cloves garlic, minced
  • 1 shallot, diced
  • 1 small onion, diced
  • 2 tablespoons fresh lemon juice, divided
  • 4 cups peeled, seeded, and thinly sliced cucumbers, plus 1/4 cup chopped cucumber for garnish
  • 1 1/2 cups low-sodium vegetable broth
  • 1/2 teaspoon Kosher salt
  • Freshly ground pepper
  • Pinch of chili powder
  • 1 avocado, diced
  • 1/4 cup chopped fresh parsley, plus more for garnish
  • 1/2 cup nonfat plain Greek yogurt
  • Diced tomatoes for garnish

Directions:

  1. Heat oil in a large saucepan over medium-high heat. Add garlic, shallots, and onion and cook, stirring occasionally, until tender, 1 to 4 minutes. Add 1 tablespoon of lemon juice and cook for 1 minute. Add the 4 cups of cucumber slices, broth, salt, pepper, and chili powder and bring to a simmer. Reduce heat and cook at a gentle simmer until the cucumbers are soft, 6 to 8 minutes.
  2. Transfer the soup to a blender. Add avocado and parsley and blend on low speed until smooth. Add the second tablespoon of lemon juice to taste and blend. (Use caution when pureeing hot liquids.) Pour soup into a serving bowl and stir in the yogurt. Refrigerate until chilled.
  3. Serve the soup garnished with diced cucumber and tomato and the chopped parsley. Enjoy!

cucumber recipes
Nutrition Note: Cucumbers are in the same family of fruit and vegetables as squash, watermelon, and cantaloupe. Nutritionally, cucumbers are a good source of phytonutrients that have anti-inflammatory and antioxidant benefits. They are also a good source of the antioxidants vitamin C and beta-carotene. Because they are water-rich, cucumbers are excellent low-calorie vegetables.

What are your favorite ways to enjoy cucumbers? 

Tomatoes and Basil

As you may know from summer’s past, I love farm-fresh tomatoes. What I love even more is the simple yet nutritious and delicious combination of tomatoes and basil. Lucky for me I have both from my CSA this week, which makes me so happy! This afternoon as I was looking in my fridge and pantry for an afternoon snack, I thought “Why not make a little tomato and basil salad?” In less than three minutes I had this beautiful salad, which paired with some cheese made for a filling and balanced snack!

tomatoes and basil

How good does that look?!

Ingredients:
  • Handful cherry tomatoes
  • 2-3 basil leaves
  • Extra-virgin olive oil
  • Aged balsamic vinegar
  • Salt & freshly ground pepper
Directions:
  1. Rinse tomatoes and basil in cold water and pat dry. Slice tomatoes in half and add to a small bowl. Tear basil leaves and add to tomatoes. Drizzle olive oil and vinegar on top of tomatoes and basil. Season to taste with salt and pepper. Enjoy the fresh flavors of the summer!

Looking for another tomato recipe? Try the Tomato Jam I made last fall.

Do you like tomatoes? What’s your favorite way to enjoy them?

Quick Quinoa Lunch

The other day I found myself scrounging for ingredients to make lunch at home (clearly I hadn’t planned my food shopping very well!). I didn’t have any lettuce to make a regular salad and I didn’t have any sandwich toppings, but I did have some vegetables, canned beans, and a whole bunch of grains in the pantry.

As you probably know by now, I love quinoa (and if you didn’t know, just check out some of my previous quinoa posts). I especially love how quickly it can be cooked up, which is perfect for a last-minute lunch dish. I ended up with a balanced, satisfying, and delicious lunch that took less than 20 minutes to make (ok – maybe this is longer than it takes to make most lunches, but it was so easy and the active time was only five minutes!).

Vegetable and Chickpea Quinoa Salad
Serves 2

Ingredients:

  • 1/2 cup dry quinoa, rinsed and drained
  • 1 cup water or low-sodium broth
  • 1/2 yellow or orange bell pepper, diced
  • 2-3 scallions, chopped
  • 4-5 roasted asparagus, chopped
  • 4 sun-dried tomatoes in oil, chopped
  • 1/2 can no-sodium chickpeas, drained and rinsed
  • Handful cilantro, chopped
  • 1 tablespoon olive oil
  • Salt and pepper, to taste

quinoa salad recipe
Directions:

  1. Cook quinoa according to package directions in water or broth. When fully cooked (water is completely absorbed), rinse under cold water and drain. Set aside in a bowl to cool.
  2. When quinoa is at room temperature, add the rest of the ingredients and toss to combine. Divide between two bowls and serve.

Nutrition Facts (per serving): 400 calories, 14 g protein, 55 g carbohydrate, 10 g fiber, 14 g fat (2 g saturated fat), 284 mg sodium

What do you make for lunch when you’re home?

Baked Falafel

In celebration of National Mediterranean Diet Month, here is the first of two Mediterranean-inspired recipes from Nutritioulicious intern Jo Bartell.

I have always loved falafel. Lucky for me there is no shortage of delicious, crispy falafel at the various Middle Eastern restaurants and falafel stands scattered throughout New York City. For those of you who are not familiar with this delicious food, Falafel is a ball or patty made of ground chickpeas. Falafel can be eaten alone as a snack, but it is often served in a pita pocket topped with vegetables and different sauces such as hummus or a yogurt sauce called tzatziki. The main ingredient of falafel is chickpeas, which makes the falafel high in protein, complex carbohydrates, and fiber. This combination of nutrients creates a healthy, satisfying meal component.

The problem with falafel from a nutritional standpoint is that it is usually deep-fried in oil. This cooking method turns a healthy dish into a less healthy version filled with saturated fat and cholesterol. Luckily, I found a great recipe for baked falafel I want to share. It is easy to make and definitely nutritioulicious!

Baked Falafel Balls (adapted from www.food.com)
Serves: 8; Serving Size: 4 falafel balls

Ingredients: baked falafel recipe
  • ¾ cup water
  • ½ cup bulgar wheat
  • 1 tablespoon extra-virgin olive oil, plus extra as needed for brushing
  • 1 red onion, finely minced
  • 1 garlic clove, minced
  • 1 ½ cups cooked chickpeas
  • ¼ teaspoon red pepper flakes
  • 1 teaspoon Kosher salt
  • 1 ¼ teaspoons ground cumin
  • 1¼ teaspoons ground coriander
  • 1 ½ tablespoons lemon juice
  • ¼ cup plus 2 teaspoons whole-wheat breadcrumbs*
  • ¼ cup minced cilantro
  • ¼ cup minced parsley

*Note: You can substitute Panko Breadcrumbs for the whole-wheat breadcrumbs.

Directions: 
  1. Bring water to a boil and remove from the heat. Mix in the bulgur. Cover and allow the wheat to sit until all the water is absorbed — about 20 minutes.
  2. Heat 1 tablespoon of olive oil in a small pan and sauté the onion and garlic over medium heat until the onion is just transparent.
  3. Add chickpeas, red chili flakes, salt, cumin, and coriander to the pan and sauté for 1 minute more. Combine the chickpea mixture and bulgur in a food processor.
  4. Add the lemon juice, breadcrumbs, cilantro, and parsley and process until just mixed and the mixture has a grainy texture. Set mixture aside for 15 minutes.
  5. Preheat oven to 400 degrees F.
  6. Form falafel mixture into 1-inch balls and place on a lightly oiled sheet pan. Brush the balls with olive oil. Bake for 25 to 30 minutes until golden, turning the pan once during baking.
Nutrition Facts (per serving): 110 calories, 3.5 g total fat (0 g saturated fat), 17 g carbohydrate, 4 g fiber, 4 g protein, 173 mg sodium

Do you like falafel? Have you ever made it at home?

Vegetable Matzo Lasagna

Even though Passover is over, I wanted to post this great recipe for matzo lasagna that I made last weekend. Growing up my mother made matzo pizza, matzo kugel, and lots of other dishes using matzo meal, but matzo lasagna wasn’t something I had ever tried – until now! My sister shared this recipe with me, but I tweaked it a bit.

Vegetable Matzo Lasagna  passover lasagna
Serves 9

Ingredients: 
  • 2 bell peppers, diced
  • 4 ounces white mushrooms, diced
  • 1 15-ounce container part-skim ricotta cheese
  • 1 10-ounce box frozen spinach, defrosted and drained well
  • Salt and pepper, to taste
  • 4-6 square matzo, slightly wet but not falling apart
  • 1 26-ounce jar tomato sauce
  • 16 ounces mozzarella cheese, shredded
  • Dried basil and oregano, to taste
Directions: 
  1. Preheat oven to400oF. Spread diced peppers and mushrooms on a foil-lined baking sheet and roast for 15-20 minutes, until soft. (You can also saute the vegetables if you prefer).
  2. Reduce oven to 350oF and line a 9″ x 13″ baking pan with tinfoil.
  3. In a medium mixing bowl, combine the ricotta and spinach. Mix well and season with salt and pepper to taste.
  4. Coat the bottom of the pan with a layer of tomato sauce.
  5. Place 1 1/2 to 2 matzos in the pan and top with half of the ricotta and spinach mixture, a layer of vegetables, 1/3 of the jar of sauce, and a layer of mozzarella cheese. Season with basil and oregano.
  6. Repeat step 4 with another 1 1/2 to 2 matzos, the remaining ricotta and spinach mixture, the remaining vegetables, 1/3 of the tomato sauce, and mozzarella. Season with basil and oregano.
  7. Top the second layer with the last 1 1/2 to 2 matzos, the remaining tomato sauce, and mozzarella. Season with basil and oregano.
  8. Cover with foil and bake 45 minutes. Uncover and bake and additional 15 minutes. Serve hot.

vegetable lasagna

Despite some apprehension (mostly from my husband) about making lasagna with matzo, this came out really great! Personally, I couldn’t even tell there was matzo in it.

Have you ever made lasagna without noodles?

Matzo Pizza

One of my favorite meals to make on Passover is matzo pizza. I’ve always been a fan of thin crust pizza, so I don’t find matzo pizza to be that different. I’ve also been told I make a mean matzo pizza — in fact, at my bridal shower when my husband was asked which recipe of mine is his favorite he said matzo pizza. (At the time he clearly hadn’t tasted most of my dishes!)

For many years I made matzo pizza on regular square matzo; however, a few years ago it occurred to me that if I use round shmura matzo it will be more like a regular pizza. (Shmura is hebrew for “guarded” and the matzo is hand-made and tends to be crispier than the machine-made square matzos.) The end result was fabulous and ever since that’s the way I’ve made it!

matzo pizza recipe

Matzo Pizza
Serves 2-3

Ingredients:
  • 1/4 cup tomato sauce
  • 2 pieces of shmura matzo (use whole wheat or regular matzo if you don’t have shmura)
  • 1/2 – 3/4 cup chopped vegetables (peppers, mushrooms, onions)
  • 1 cup shredded mozzarella and/or cheddar cheese
  • Dried basil & oregano
Directions:
  1. Preheat oven to 375oF.
  2. Spread tomato sauce on each of the pieces of matzo. Top with chopped vegetables and cheese. Sprinkle with herbs.
  3. Bake pizza for about 10 minutes until the cheese is melted and starts to bubble.

matzo pizza recipe passover     passover pizza recipe

Nutrition Note: To make the meal complete, serve with a large mixed salad.

Have you ever tried matzo pizza? What toppings do you like on your pizza?

Garlicky Green Beans

A couple of weeks ago at an Italian restaurant, I had Burnt Green Beans.  I didn’t really know what it was when we ordered it, but the waiter said that they were just very well done green beans (aka string beans) sauteéd with oil and garlic. It sounded good to my fellow diners and me! Turns out they were delicious, especially the chunks of garlic dispersed throughout. I decided to try to recreate the recipe at home and it was a hit! I didn’t cook the green beans for as long as they must have at the restaurant, so they maintained a crispness that I really enjoyed. It was a great side dish for my Soy Ginger Chicken Negimaki.

Garlicky Green Beans 
Serves 2green beans recipe

Ingredients:

  • 2 teaspoons canola oil
  • 3 cloves garlic, chopped
  • 1/2 pound green beans, washed and trimmed
  • Kosher salt and pepper, to taste
Directions:
  1. Heat the oil in a large skillet over medium-high heat. Add the garlic and stir constantly until fragrant, about 30 seconds. Add the string beans and sauté about 8-10 minutes until the string beans are cooked but still crisp. Sprinkle with salt and pepper, toss, and serve.

Nutrition Facts (per serving): 82 calories, 4.5 g total fat, 0 g saturated fat, 9.5 g carbohydrates, 4 g fiber, 2.5 g protein

Some people question whether green beans count as a vegetable or as a starch (since it’s a bean). I count them as a vegetable since they are lower in calories and carbs than most starchy vegetables (like potatoes, winter squash, corn, and peas). Green beans are a good source of fiber, the antioxidant vitamin C, and vitamin K, which is important for blood coagulation and bone formation.

Do you like green beans? How do you like to cook them?

National Grilled Cheese Month!

Did you know April is National Grilled Cheese Month? I love cheese, especially the ooey, gooey deliciousness of melted cheese between two slices of bread, so I am more than happy to celebrate this national “holiday” with some memories of grilled cheese from when I was a kid and a classic recipe with a healthy twist.

When I was younger, my mom made me grilled cheese in a toaster oven. She would put the bread in the toaster oven for one round of initial toasting. Then she’d put a slice of American cheese on each piece of bread and put it back in the toaster oven until the cheese was melted and bubbly. Once removed from the oven, she would quickly put the two slices of bread together, cut in half, and I was off to enjoy! There was no addition of butter or margarine, just plain, simple grilled cheese. I didn’t even realize until I got older that grilled cheese is traditionally made on a griddle with butter (and a lot of it)!

Now that I live in an apartment and don’t have room for a toaster oven, I make my grilled cheese sandwiches on the stove top like it’s traditionally done. The main difference is that instead of butter I use Smart Balance Light Buttery Spread, which has half the calories and less than half the fat of butter, and I use just enough of the Smart Balance to coat the pan (less than a tablespoon for sure). I also use Sandwich Thins instead of regular bread — saves another 50-60 calories. All these calorie savings leave me room for the star of the show — the cheese! Here are the four easy steps to make a classic grilled cheese sandwich:

  1. Melt less than a tablespoon of Smart Balance Light in a nonstick pan.
  2. Add the bottom of a Sandwich Thin to the pan and top with 1 1/2-2 ounces of the cheese of your choice.
    national grilled cheese monthI used one of my favorite cheeses — Cabot Seriously Sharp Cheddar. (It’s best not to use fat-free cheese since it doesn’t melt as well and isn’t as flavorful.)cabot cheddar cheese
  3. Add the top of the Sandwich Thin and press down with a spatula until the cheese starts to melt. Once it is melting, flip the sandwich over to brown the top of the sandwich.national grilled cheese month
  4. Once the cheese is sufficiently melted, transfer the sandwich to a plate, slice in half, and eat immediately!

healthy grilled cheese sandwichgrilled cheese

Nutrition Facts: 346 calories, 23 g carbohydrate, 5 g fiber, 19 g protein, 22 g fat, 11 g saturated fat, 61 mg cholesterol, 635 mg sodium, 445 mg calcium

Do you like grilled cheese? What’s your favorite way to make it?

Disclaimer: I was not paid to promote any of the brands in this post. All opinions are my own.