When I first found out this month’s Recipe ReDux theme, frozen desserts, I was a little worried. First of all, I don’t make dessert very often – don’t get me wrong, I eat plenty of it, I just buy it instead! Second, I don’t have an ice cream maker or popsicle molds, so all the ideas that originally came to mind wouldn’t work. But as I continued to think about what I would make, I realized simplicity was the way to go. Plus, I wanted to make something that most people could easily whip up without having special gadgets taking up room in their kitchens.
Watermelon sorbet sounds like it would be a lot more complex to make than it actually was. This recipe is so quick and easy, only requires a blender and ramekins, and the result is a refreshing treat that the whole family can enjoy. An added bonus: it’s low in calories and a great source of the antioxidants vitamin A and lycopene too! (Find out more of the nutritional benefits of watermelon.)

Ready to serve!
Watermelon Sorbet
Serves 4
Ingredients:
- 1 tablespoon sugar
- 1/4 cup water
- 2 cups watermelon cubes
- 3 teaspoons fresh lemon juice
Directions:
- Combine the sugar and water in a small saucepan and bring to a boil. Reduce the heat and simmer until the sugar is completely dissolved. (Since there is very little sugar, this will happen quickly. Keep an eye on it to make sure the water doesn’t evaporate.) Remove from the heat and set aside.
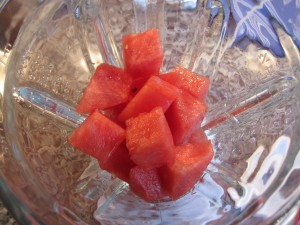
- In a blender, combine the watermelon cubes, lemon juice, and simple syrup. Blend until no watermelon chunks remain.

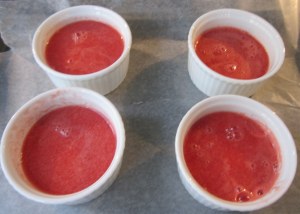
- Divide the mixture evenly among four ramekins. Cover with plastic wrap and freeze for at least three hours. Enjoy!

Watermelon sorbet before freezing
Nutrition Facts (per serving): 35 calories, 9 g carbohydrate, 8 g sugar (only 3 g added sugar), .5 g protein, 0 g fat
For more delicious frozen desserts, check out these great recipes from my fellow ReDuxers!
- Emma Stirling — The Scoop on Nutrition Greek Yogurt Pavlova Popsicles
- Cherie Schetselaar — Grain Crazy Blackberry Lemon Almond Torte
- Emma Cutfield — The Hearty Heart Coconut Ice, Blueberry and Cocoa, Joint Healing Dessert
- Carlene Helble — Carlene’s Figments Peanut Butter Banana ‘Ice Cream’ Sandwich
- Janel Funk — Eat Well with Janel Peanut Butter and Jelly Ice Cream
- Kat Lynch — Eating The Week Coconut Chia-Seed Fruit Pops
- Dr Barb — Nutrition Budgeteer Simply Fruit Mango-Pineapple Sorbet
- Rebecca Scritchfield — MeFirst 5-minute Frozen Peach Pie
- Gretchen — Kumquat Chocolate “Ice Cream” Bars
- Emily Greenfield — The Nutriscientist Honey and Strawberry Semifreddo
- Liz Marr — Liz On Food Peach Lavender Ice Cream
- Elizabeth Jarrard — Don’t (White) Sugar-Coat It Adult Popsicles: Frozen Boozy Treats
- Regan — The Professional Palate Frozen Samoa Pie
- Liz Weiss & Janice Newell Bissex — Meal Makeover Moms’ Kitchen Healthy Blueberry and Mango Snow Cones
- Jessica Fishman Levinson — Nutritioulicious Watermelon Sorbet
- Alexandra Caspero — Delicious Knowledge Mango & Coconut Popsicles
- Karman Meyer — Nutrition Adventures Coconut Ice Cream with Strawberry Puree
- Yuri — Chef Pandita Acerola Chia Lime Popsicles
- Kristen Bourque — Swanky Dietitian Peanut Butter Coffee Popsicles
- EA Stewart — The Spicy RD Luscious Lemonade Pie
- Danielle Omar — Food Confidence RD Banana Soft Serve
- Katie Caputo — East Meats West Auntie Rosie’s Ice Cream Pie
- Alysa Bajenaru — Inspired RD Coffee Granita
- Kara Lydon — Peace, Love, and Food Peanut Butter Banana “Ice Cream” With Dark Chocolate
- Serena Ball — Teaspoon of Spice Splendid Key Lime Frozen Yogurt
- Nicole Ferring Holovach — Whole Health RD Peaches and Rum Ice Cream Pie
- Lisa @ Healthful Sense Peanut Butter Vanilla Soft Serve
- Jackie Mills — Delicious Diabetes Cooking Summer Fruit Popsicles
- Audra Losey — Nutrition Know How Mocha Pops
- Kristina LaRue — Love and Zest Frozen Berry Yogurt


